If you’re looking for a powerful marketing automation solution for your WordPress/WooCommerce site, look no further than AutomateWoo. It streamlines marketing efforts by automating email marketing, abandoned cart recovery, personalized coupons, and more.
AutomateWoo allows you to easily create complex automation sequences using intuitive drag-and-drop visual workflows and is fully customizable, with a range of integrations and add-ons available to tailor your automation to your specific needs. With AutomateWoo, you can save time, increase revenue, and grow your business effortlessly!
In this guide, I show you how to configure AutomateWoo’s core settings, set up real-world workflow examples, integrate MailPoet, and more. You can do a million cool things with AutomateWoo, and I’m just touching on a few of them.
AutomateWoo and MailPoet
While I touch on the MailPoet solution, this guide’s primary focus is AutomateWoo. I have a separate, in-depth guide for MailPoet that shows you how to Do Better MyListing WooCommerce Email Marketing Using MailPoet.
There is a good amount of overlap in functionality between AutomateWoo and MailPoet. I’ll cover exactly what I’m doing within my businesses.
WooCommerce Subscriptions ‘On Hold’
If you use WooCommerce Subscriptions, you will eventually encounter situations where subscriptions are placed ‘On Hold.’
When this happens, WooCommerce does not provide an elegant way for you to deal with it, whether it’s notifications, kicking off a workflow like removing people from MailPoet subscription lists, or something else.
In short, I found that subscriptions were being placed ‘On Hold,’ and I didn’t know about it. This caused a revenue loss and other unwanted consequences. AutomateWoo is a solution that addresses this issue.
Credit Card Expiration Notices
WooCommerce doesn’t provide a way to notify customers when their credit card is about to expire.
Giving customers the courtesy of knowing their credit card is about to expire is not only a nice thing to do but also helps prevent their subscriptions with you from going unpaid. AutomateWoo is a solution that provides this feature.
Purchase Follow-Up/Onboarding
MailPoet has a similar feature, but it’s geared toward customers making their first purchase. Whereas with AutomateWoo, you can create powerful and granular workflow automations with triggers, rules, and actions.
When someone purchases a MyListing Starter Site, Kinsta Hosting, etc., I need a way to send onboarding information to those customers. AutomateWoo is a solution that provides this feature.
AutomateWoo Integrations and Add-ons
Before we set up AutomateWoo, here’s a breakdown of all the current integrations and add-ons.
Integrations
- ActiveCampaign
- Campaign Monitor
- Mad Mimi
- Mailchimp
- Mailpoet
- WooCommerce Bookings
- WooCommerce Points and Rewards
- WooCommerce Memberships
- WooCommerce Subscriptions
- WooCommerce Wishlist
- Twilio SMS
- Yith Wishlist
Add-Ons
- Birthdays (Do something special for customers on or around their birthday.)
- Refer A Friend (Reward customers when they recommend your products/services.)
- AgileCRM (Hook into this solution.)
AutomateWoo Setup
General
AutomateWoo > Settings > General
- Install and activate AutomateWoo.
- WordPress Dashboard > Pages > Delete the ‘Communication Preferences’ page AutomateWoo creates. (Note: I’m using MailPoet, which provides more comprehensive and better-looking communication preference options.)
- Marketing Opt-In > Opt-In Checkbox Locations > I’m using MailPoet to opt-in customers, so I uncheck these options in AutomateWoo.
- Session Tracking > Enable Session Tracking > I’m using MailPoet to track cart activity, so I uncheck these options in AutomateWoo.
- Email Sender Options > Ensure these settings are correct.
- Misc > Automatically Delete Expired Coupons > I uncheck this and configure expiration within each WooCommerce coupon.
- Save changes.
Carts
AutomateWoo > Settings > Carts
Enable Cart Tracking > I disable this feature because I don’t need to track failed, canceled, or pending orders. (Note: For now, I just want to track ‘Abandoned Carts,’ which I do with MailPoet.)
Workflows
AutomateWoo > Workflows
Workflows are where you make all the magic happen, whether creating a custom workflow from scratch or using one of the preset workflows already built for you. Tell AutomateWoo what to look for (i.e., trigger), how to further narrow down a trigger (i.e., rules), and then what to do once the trigger/rules are activated (i.e., actions).
Triggers
- Customers: Account Created, Total Spend, and more.
- Memberships: Created and Status Changed.
- Orders: Created, Processing, Completed, and more.
- Reviews: New Review Posted
- Subscriptions: Created, Status Changed, and more.
- Downloadable Content: File Downloaded, File Not Yet Downloaded, and more.
- And more.
Rules
Note: Available Rules are only shown once you first select a Trigger.
- Cart: Total, Items, Coupons, and more.
- Customers: Location, User Role, Active Membership, and more.
- Guests: Email and Order Count.
- Orders: Status, Items, Item Categories, and more.
- Order Line Items: Quantity, Product, Meta, and more.
- Products: Product and Product Categories.
- Referrals: Total Referral Count, Potential Fraud Referral, and more.
- Reviews: Review Rating
- Subscriptions: Status, Items, Trial End Date, and more.
- Workflow: Run Count for Order, Run Count for Customer, and more.
- And more.
Actions
- Customers: Change Customer Role, Add Tags to Customer, and more.
- Emails: Send Email, Send Plain Text Email, and more.
- Memberships: Create/Change Membership Plan, Delete Membership, and more.
- Orders: Change Order Status, Add Note, Add/Update Meta, and more.
- Subscriptions: Add Coupon, Change Status, Send Invoice, and more.
- And more.
Real-World Workflow Examples
Subscriptions ‘On Hold’
This example is for those who use the WooCommerce Subscriptions plugin to provide Listing Subscription Packages, other types of subscriptions, membership access based on packages purchased, etc.
Subscriptions are placed ‘On Hold’ when an associated order is awaiting payment or the store owner or customer has manually suspended it.
By default, only customers are alerted to this, and given that subscriptions can remain ‘On Hold’ indefinitely, this is potentially a significant problem.
Furthermore, when a subscription is ‘On Hold,’ the user associated with the subscription will be assigned the default inactive role and may no longer be granted special access by other extensions, like WooCommerce Memberships, code snippets you have in place to hide/show areas of your website, etc.
What if your customers are not getting email notifications for some reason? What if they get the notifications and forget to act on them? Whatever the reason, you, the MyListing website owner, should be aware of any ‘On Hold’ situations.
Alerting a customer that their Listing Subscription is ‘On Hold’ shows them that you are looking out for them in general, ensuring their Listings stay active, membership access is not interrupted, etc.
- AutomateWoo > Workflows > Click ‘Add Workflow.’
- Title > ‘WooCommerce Subscriptions ‘On Hold”
- Timing > Delayed
- Length of the Delay > 30 minutes (Note: This allows new orders to get through the system, which can temporarily trigger a temporary ‘On Hold’ status.)
- Options > Is Transactional? > Enable
Note: The “Is Transactional?” setting ensures the email is sent regardless of the customer’s opt-in status (with AutomateWoo).
- Options > Enable Tracking > Enable
- Trigger > Subscriptions > ‘Subscription Status Changed’.
- Status Changed From > ‘Active’.
- Status Changed To > ‘On Hold.’
- Subscription Products > Specify certain products or leave blank to monitor all subscriptions.
- Actions > Click ‘Add Action’
- Action > ‘Send Email’
- To > Add the desired variables (i.e., recipients), such as ‘customer.email’, by clicking the variable button under the ‘Variables Sidebar,’ clicking ‘Copy to Clipboard,’ and then pasting the variable into the ‘To’ field.
- Email Subject > Adjust as desired.
- Email Content > Adjust as desired, adding content and the desired variables. (See provided template.)
Note: This is the text version of the template, allowing me to provide you with every aspect of it. To apply it (and any other template I provide within this guide), switch to the ‘Text’ tab within the ‘Email Content’ area of the Workflow and paste it in.
Hi {{ customer.first_name | fallback: 'there' }},

At least one of your subscriptions has been placed 'On Hold' due to failed payment.

<strong>Please refer to the </strong><a href="https://domain.com/policies/terms-of-service/" target="_blank" rel="noopener nofollow"><strong>our Terms of Service</strong></a><strong> to view and avoid upcoming penalties.</strong>


<em><strong>-------------- AVOID UPCOMING PENALTIES ----------------</strong></em>

To avoid upcoming penalties, please perform the steps below.
<ol>
 	<li>Ensure your account has a <a href="https://domain.com/my-account/edit-account/" target="_blank" rel="noopener nofollow">valid payment method</a>.</li>
 	<li>Click on the<a href="https://domain.com/my-account/subscriptions/" target="_blank" rel="noopener nofollow"> subscriptions tab</a> within your account.</li>
 	<li>Click the 'Reactivate' button next to subscriptions with an 'On Hold' status.</li>
</ol>
Thank you!

Name,
Company- Click ‘Preview’ to review your email content and send yourself an email to see how the message looks in various email clients (Outlook, Gmail, etc.).
- Save changes.
- Test the flow.
Credit Card Expiry Reminder
Note: This Workflow works with Stripe, WooCommerce Payments, and Simplify Commerce payment options.
As with the Workflow outlined in the previous section, alerting customers that their credit card used on your website is about to expire shows that you care and are proactive.
Aside from the customer benefits, there are significant benefits for the store owner. Why? Simple. If a subscription is On Hold, you are no longer generating revenue, and an expired credit card could be the cause.
I’m guessing you can see the importance here, so let’s implement a Workflow that will trigger emails to customers reminding them that a saved credit card will expire soon.
- AutomateWoo > Workflows > Browse Presets > Credit Cards: Expiry Reminder > Click ‘Create Workflow.’
- Status > Active
- Options > Is Transactional? > Enable
- Adjust the email settings as desired.
Hi {{ customer.first_name | fallback: 'there' }},

<strong>Your credit card on file expires next week.</strong>

Please update your billing information with an active card to avoid problems or interruptions.

<a class="automatewoo-button" href="https://domain.com/my-account/edit-account/" target="_blank" rel="noopener nofollow">Update Your Account</a>

Thank you!

Name,
Company- Click ‘Preview’ to review your email content and send yourself an email to see how the message looks in various email clients (Outlook, Gmail, etc.).
- Save changes.
That’s pretty much it! If you have a global customer base as I do, configuring the settings related to “time” (time zone, send timing, etc.) doesn’t come into play or becomes challenging to dial in if you wish to try and optimize the best sending time.
However, emailing at optimal times is a good idea if your customer base is region-specific. You can search the web for ‘the best times of day to send emails’ and find some best practices.
Subscription Renewal Reminders
By default, WooCommerce Subscriptions doesn’t alert customers when their next subscription payment is due, which can be a problem for some customers.
Here are the steps for this specific workflow, whether you want to roll out this workflow immediately or wait to hear feedback from your customers.
- AutomateWoo > Workflows > Click ‘Add Workflow.’
- Title > ‘WooCommerce Subscription Renewal Reminders ‘
- Options > Is Transactional? > Enable
- Options > Enable Tracking > Enable
- Trigger > Subscriptions > ‘Subscriptions Before Renewal’
- Days Before Renewal > Choose the desired value.
- Actions > Click ‘Add Action’.
- Action > Email > ‘Send Email’
- To > Add the desired variables (i.e., recipients), such as ‘customer.email’, by clicking the variable button under the ‘Variables Sidebar,’ clicking ‘Copy to Clipboard,’ and then pasting the variable into the ‘To’ field.
- Email Subject > Adjust as desired.
- Email Content > Adjust as desired, adding content and the desired variables.
Hi {{ customer.first_name | fallback: 'there' }},

<strong>This is just a courtesy email. <em>No action is required.</em></strong>

You have subscriptions renewing next week.

{{ subscription.items }}

<a class="automatewoo-button" href="https://domain.com/my-account/subscriptions/" target="_blank" rel="noopener nofollow">View Your Subscriptions</a>

Thank you!

Name,
Company- Click ‘Preview’ to review your email content and send yourself an email to see how the message looks in various email clients (Outlook, Gmail, etc.).
- Save changes.
Product Purchase
For this Workflow example, the customer purchases a product with some accompanying onboarding instructions. Additionally, the customer should be added to the appropriate email list within MailPoet so future communication can be done in bulk with all customers who have purchased the particular product.
- AutomateWoo > Workflows > Click ‘Add Workflow.’
- Title > ‘Kinsta Hosting’
- Options > Is Transactional? > Enable
- Options > Enable Tracking > Enable
- Trigger > Orders > ‘Order Created’
- Rules > Click ‘Add Rule Group.’
- Rule > ‘Order – Item’ + ‘matches any’ + the selected product
Action 1 – Onboarding / Welcome Email
- Actions > Click ‘Add Action’.
- Action > Email > ‘Send Email’
- To > Add the desired variables (i.e., recipients), such as ‘customer.email’, by clicking the variable button under the ‘Variables Sidebar,’ clicking ‘Copy to Clipboard,’ and then pasting the variable into the ‘To’ field.
- Email Subject > Adjust as desired.
- Email Content > Adjust as desired, adding content and the desired variables.
Hi {{ customer.first_name | fallback: 'there' }},

Thank you for signing up! <em>So, what's next?</em>

Please complete the <a href="https://domain.com/onboarding" target="_blank" rel="noopener nofollow">Onboarding form</a>, and we will get things going for you.

<em><strong>NOTE:</strong> If you placed your order outside of our regular business hours (your business hours), rest assured that we'll get you onboarded as soon as we can.</em>

Thank you!

Name,
Company- Click ‘Preview’ to review your email content and send yourself an email to see how the message looks in various email clients (Outlook, Gmail, etc.).
- Save changes.
Action 2 – Add Customer to MailPoet List
- Actions > Click ‘Add Action’.
- Action > MailPoet > ‘Add Customer to List’
- List > Choose the desired MailPoet list.
- Double Opt-in> Enable
- Save changes.
- Test this action by placing an order for the product and ensuring the customer is added to the correct MailPoet list.
Real Cron vs. WP Cron
WP-Cron is how WordPress handles scheduling time-based tasks. Many WordPress core features (checking for updates, publishing scheduled posts, etc.) rely on it by checking a list of scheduled tasks on every page load to see what needs to be run.
Replacing the WordPress Cron (WP-Cron) system with a real Cron job on your server can improve your site’s stability and performance. AutomateWoo especially benefits from this since it uses Cron heavily, running many tasks asynchronously to avoid slowing down requests to your site.
Disable Real Cron
- Using an FTP application like FileZilla (Free) or a WordPress ‘File Manager’ plugin, edit the wp-config.php file at the root of your WordPress install.
- Add the code snippet below to your wp-config.php file.
- Save Changes.
define('DISABLE_WP_CRON', true);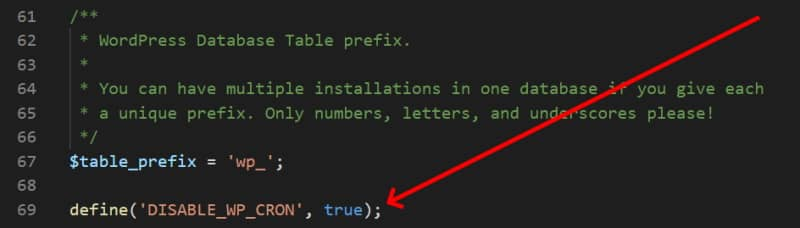
Enable Real Cron
Note: When using AutomateWoo, it’s recommended that you set the Cron interval time to no more than 5 minutes.
Those hosting their websites with my preferred vendor can jump on a support chat and request that Real Cron be implemented.
Monitoring
Outside of the core setup, integration settings, and workflows, most of AutomateWoo’s menu items (Dashboard, Logs, Reports, etc.) concern monitoring activity.
There’s not much to say in this area other than to point out the importance of reviewing the menu items and their associated data to understand how well your site is converting and retaining customers.
Video Tutorial
