The Request
“Ryan, my users have links to external websites where they sell their books. The links are long and ugly, and I need a better way to display them. Buttons would be ideal.”
Create the Button
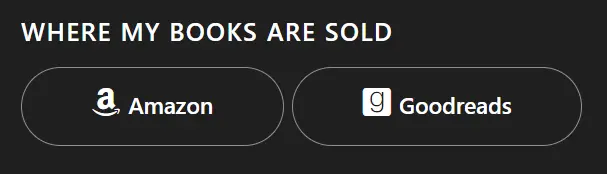
In this example, I’ll show you how to use MyListing’s button shortcode generator to add a button for an external website, like a book listed on Amazon. We’ll then drop those buttons into a block within the Single Listings to showcase all of the places where the author sells their books.
- WordPress Dashboard > Theme Tools > Shortcodes > Button
- Content > Add the text that will appear on the button (e.g., ‘Amazon’).
That’s it as far as creating the button. We’ll go with the default settings for the rest, knowing you can always return to the button shortcode generator to adjust the style, size, etc.
Let’s keep the current screen/tab open in your browser so we can reference it here shortly.
Add the Button
- WordPress Dashboard > Right-click on Listing Types and choose to open them in a new browser tab.
- Click on the desired listing type to edit it.
- Listing Type > Fields > Create a Custom Field > Click Form Heading to add the custom field to your listing type.
- Click on the field to edit it.
- Label > ‘Where My Books Are Sold’
- Icon > Choose the desired icon (e.g., book icon) or remove it altogether.
- Show in Listing Comparison > Toggle OFF.
- Enable Package Visibility > Optionally toggle ON and configure this option if you want to upsell your packages, allowing the author to list their books for sale on external websites.
- Listing Type > Fields > Create a Custom Field > Click URL to add this custom field to your listing type.
- Click on the field to edit it.
- Label > ‘Amazon’
- Placeholder > Optionally add a placeholder (e.g., https://amazon.com/link-to-my-book) to help guide the listing owner.
- Description > Optionally add a description to help guide the listing owner even further.
- Show in Listing Comparison > Toggle OFF.
- Enable Package Visibility > Optionally toggle ON and configure this option if you want to upsell your packages, allowing the author to list their books for sale on external websites.
- Listing Type > Single Page > Content & Tabs > Choose the tab where you want to add the buttons.
- Insert a New Block > Click on ‘Details’ to drop that block into the listing type.
- Click on the Details block to edit it.
- Label > Assign it a label (e.g., ‘Where My Books Are Sold’).
- Block Icon > Choose the desired icon (e.g., book icon) or remove it altogether.
- Custom Block Classes > Enter ‘sellbooks,’ which is referenced in other areas of this guide.
- Click Add Row.
- Click the row to edit it.
- Content > Go back to the shortcode tab you have open in your browser, copy the ‘Generated Code,’ and paste it here.
- Replace the ‘#’ portion of the content with the snippet below.
[[amazon]]Note: Please check out the video at the bottom of this guide to better understand how to dynamically insert data (e.g., inserting the Amazon field value) into shortcodes, as it’s a bit hard to explain here.
- Save changes.
- Repeat steps 22-25 for each additional website where the author’s books might be sold.
Alternate Button Creation
More advanced users can use the HTML below to start creating their buttons. This method bypasses the need to use MyListing’s button shortcode generator.
<a target="_blank" class="buttons button-4" href="yourlink.com">Click here</a>If we compare this approach to the button shortcode generator, the following would be our shortcode.
<a target="_blank" class="buttons button-4" href="[[amazon]]">[27-icon icon="fab fa-amazon"] Amazon</a>
<a target="_blank" class="buttons button-4" href="[[goodreads]]">[27-icon icon="fab fa-goodreads"] Goodreads</a>Hide Block Row Icons
Unfortunately, MyListing automatically adds icons to each row, even if you don’t specify one. You need CSS to hide the icons, and those steps are shown below.
- Edit the ‘Details’ block.
- Custom Block Classes > Enter ‘sellbooks’.
- Add the following CSS to your website.
.sellbooks .details-block-content>li>i {
    display: none;
}Opening the Links in a New Browser Tab
This feature is important for external links because you don’t want to take people away from your website. Unfortunately, we can’t build upon our button shortcode to do this.
We must add the Open Links Within Blocks in a New Tab code snippet.
Styling the Buttons
Button Alignment
By default, the buttons are displayed stacked (e.g., display: flex) rather than inline side by side (e.g., display: inline-block). I used the following CSS to display them inline.
.sellbooks li {
    display: inline-block;
}Add Icons
- WordPress Dashboard > Theme Tools > Theme Options > Shortcodes > Icon
- Shortcode Options > Choose the desired icon (e.g., ‘Amazon’).
- Generated Code > Copy and inject it into your Button shortcode, as shown below.
[27-button href="[[amazon]]" animated="no"][27-icon icon="fab fa-amazon"] Amazon[/27-button]MyListing Button Styles
By default, MyListing applies button colors based on your ‘Accent Color’ (Theme Tools > Theme Options > Accent Color). However, note that if you’ve customized your buttons using CSS in the past, that CSS could also influence their color.
The easiest thing to start with is to adjust the style using the options that MyListing gives you in the button shortcode generator. By default, MyListing uses Style 1, even though it’s not specified, as shown in the shortcode below. There are six styles in total.
[27-button href="[[amazon]]" animated="no"][27-icon icon="fab fa-amazon"] Amazon[/27-button]Want to try Style 2? Insert that style as shown below.
[27-button href="[[amazon]]" style="2" animated="no"][27-icon icon="fab fa-amazon"] Amazon[/27-button]Don’t like Style 2? Replace the ‘2’ with a ‘3’ and see how that looks. Review all six styles and see which you like best.
[27-button href="[[amazon]]" style="3" animated="no"][27-icon icon="fab fa-amazon"] Amazon[/27-button]If you want to style them further with CSS, you can target the ‘.button-4’ class. Guess where that ‘4’ came from? Yep, from Style 4, which you used when creating the shortcode.
[27-button href="[[amazon]]" style="4" animated="no"][27-icon icon="fab fa-amazon"] Amazon[/27-button]I ended up with Style 4, along with some CSS to remove the link underline and round the corners of the buttons.
.button-4 {
    border-radius: 25px;
    text-decoration: none;
}
Video Tutorial
