The Problem
When user testing, one topic that often needed clarification was Listing Promotions. “What does that ‘Promote’ icon do?” “What does it mean to Promote my Listing?”
Sure, we can and do have an educational page (e.g., Listing 101, Platform 1o1, etc.) where we cover what Listing Promotions are and how they work, but what if the customer has yet to visit that page and becomes curious about that darn ‘Promote’ icon starring back at them?
We need a solution that educates customers in real time as they progress through the customer journey.
The Solution
I thought I’d use Loco Translate to inject a link into the Promotions modal, and while that “worked,” it was super clunky and not the right way to do it. Ultimately, I rolled up my sleeves, edited a theme file to inject a link, and then applied CSS.
Implement the Solution
Theme File
- Install and activate the MyListing Child Theme if you haven’t already.
- Connect to your server using an FTP application such as FileZilla (Free). (Note: You can also use a ‘File Manager’ plugin from the WordPress repository, but we always recommend editing files using FTP just in case something goes wrong.).
- Once connected, browse to wp-content/themes/my-listing/templates/dashboard/promotions.
- Copy the ‘choose-promotion.php’ file down to your workstation.
- Edit the file using your preferred code/text editor.
- Starting at line 94, add the code shown below, adjust the domain to match your own, and customize the educational page.
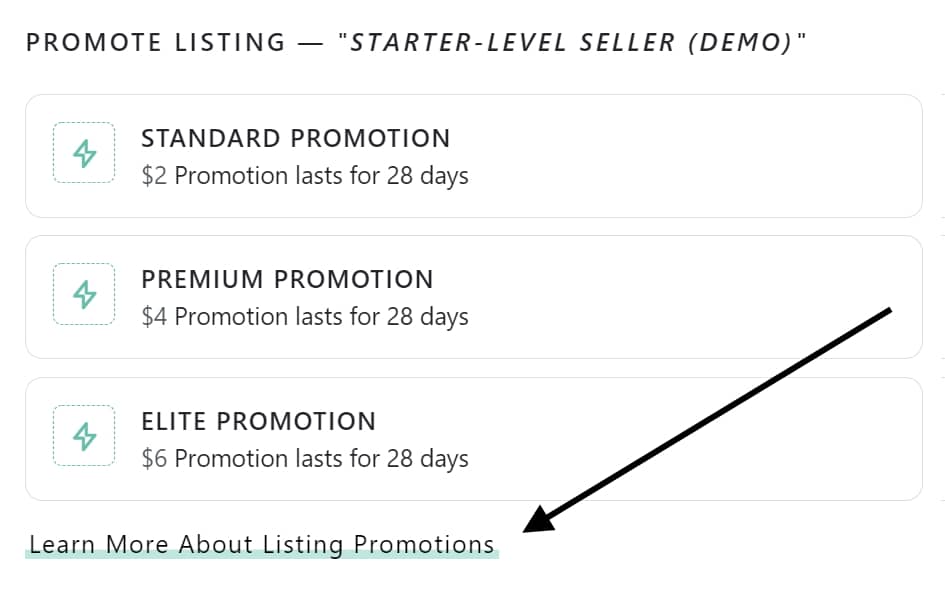
<span class="learn-about-promtions">
<?php Echo "<a href=https://your-domain/platform-101/#listing-promotions target="_blank" rel="noopener nofollow">Learn More About Listing Promotions</a>" ?>
</span>
The screenshot below shows what lines 90-100 look like for my MyListing websites so that you have something to compare against.

- Save the changes to your file.
- Using FTP, browse to to wp-content/themes/my-listing-child.
- Replicate the same file structure from step #3 so that, in the end; you have a path of wp-content/themes/my-listing-child/templates/dashboard/promotions.
- Copy the adjusted file you saved in step #7 to the path in step #9.
At this point, you have added your custom ‘choose-promotion.php’ file to your child theme, which will be protected from future theme updates. Now, it’s time to apply some CSS to design your injected link so it looks nice when customers notice it.
CSS
- Copy the CSS below and add it to your website using a plugin like WPCodeBox.
- Adjust the CSS as desired.
- Save your changes.
.learn-about-promotions a {
  	color: #000;
  	transition: box-shadow .35s ease-in-out;
  	padding-left: 2px;
  	padding-right: 2px;
	  box-shadow: inset 0 -0.6em 0 -3px #56bdaa61;
  	letter-spacing: 1px;
  	font-size: 14px;
}

.learn-about-promotions a:hover {
  	box-shadow: inset 0 -1em 0 #56bdaa61;
}
The Outcome
Video Tutorial
