In this guide, I show examples of how you can individually style Single Listing blocks using nothing more than CSS.
To help with this, we’ll be using WPCodeBox, my recommended way of adding custom CSS to your website for those who care about website performance, saving time, reducing administrative overhead, etc.
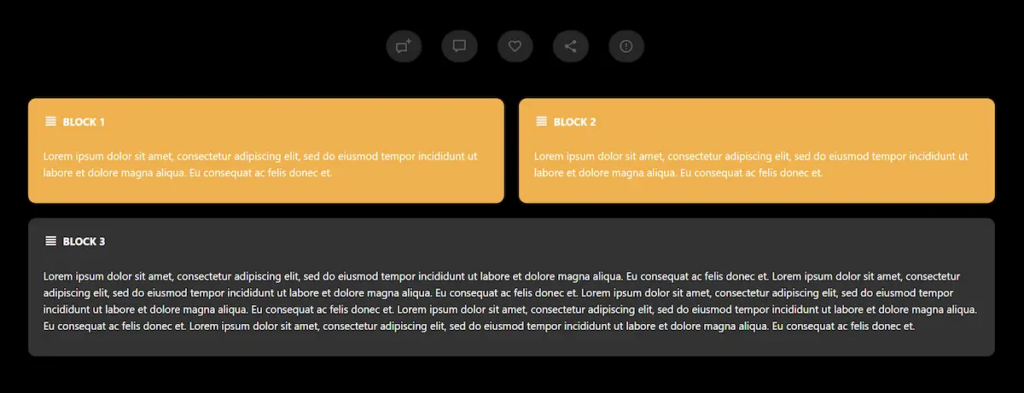
Example 1: Two Side by Side Blocks Within Single Column Layout With Solid Backgrounds
In this example, the goal is to have two blocks appear at the top of the Listing, each with a unique style compared to the others. The Listing Type we are working with is configured to have a single-column layout, so our two blocks will appear with a 50/50 layout above the other blocks.
Listing Type Set Up
Fields
This guide assumes you have already added the fields to your website.
Content & Tabs
- Listing Types > Edit Listing Type > Single Page > Content & Tabs
- Click ‘Add Custom Tab.’
- Edit the tab, setting the layout to ‘Single Column.’
- Add two blocks to the tab.
- Edit one of the blocks.
- Custom Block ID > Add ‘solidbackgroundblock.’
- Repeat the steps for the second block.
- Save changes.
Custom CSS
Add the CSS below to your website.
/**** CONTAINER ****/
#solidbackgroundblock {
    margin-bottom: 20px;
}
/** SHOW BLOCKS AT 50% WIDTH ONLY ON LARGER SCREENS **/
@media only screen and (min-width: 1200px) {
#solidbackgroundblock {
	width: 50%;
}
	}
/**** INNER CONTAINER  ****/
#solidbackgroundblock .element {
    background: var(--accent);
}
/**** ICON ****/
#solidbackgroundblock .title-style-1 i {
    color: #fff;
}
/**** TITLE  ****/
#solidbackgroundblock .title-style-1 h5 {
    color: #fff;
}
/**** CONTENT  ****/
#solidbackgroundblock p {
    color: #fff;
}
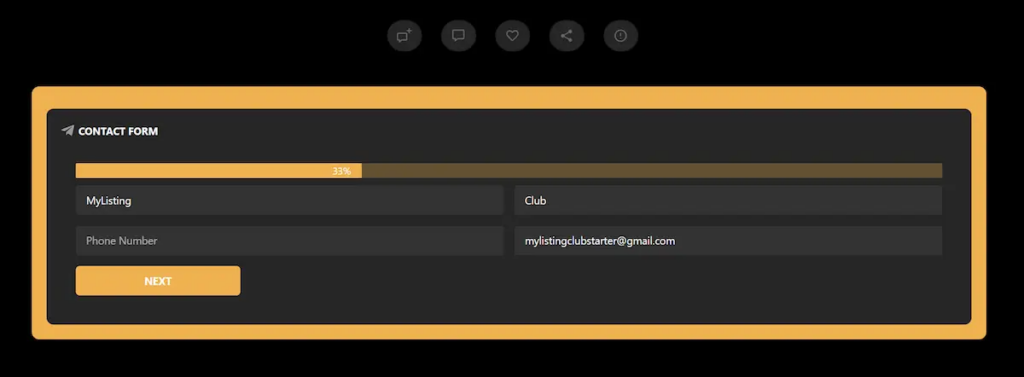
Example 2: Contact Form
In this example, we are styling the Single Listing Contact Form block to stand out from the other blocks. For these steps, the assumption is that you’re Replacing Contact Form 7 with Elementor Pro.
Listing Type Set Up
Fields
This guide assumes you are using Elementor Pro forms, in which case the ‘Contact Form’ field is not required. If you’re using Contact Form 7, this guide assumes you have already added the ‘Contact Email’ field.
Content & Tabs
This guide assumes you are using Elementor Pro forms, in which case the ‘Contact Form’ block is not used, and instead, the ‘Shortcode’ block is used with Elementor Pro forms.
- Edit the ‘Contact Form’ block.
- Custom Block ID > Add ‘contactformblock.’
- Repeat the steps for the second block.
- Save changes.
Custom CSS
Add the CSS below to your website. In the screenshot below, the entire Single Listing has a black background, and the contact form has a lighter shade of black as applied by the CSS.
/**** CONTAINER ****/
#contactformblock {
    background: var(--accent);
    padding: 10px 20px 20px 20px;
    border-radius: 10px;
}
Video Tutorial
