For this guide, we’ll use Solid Affiliate, a plugin that provides everything you need to run an affiliate program with WooCommerce. Solid Affiliate makes it easy to manage, track, and pay your affiliates from the comfort of your WordPress dashboard.
In this guide, I’ll document my implementation process for the Club. While the Club is not a MyListing website, it runs on WooCommerce, so the principles are the same.
Setup Wizard
- Download, install, and activate the Solid Affiliate plugin.
- Run through the super simple setup wizard.
Note: If you decide to use ‘Affiliate Coupons,’ Solid Affiliate will create a coupon and place it within WooCommerce (WordPress Dashboard > WooCommerce > Marketing > Coupons). I just wanted you to be aware so you don’t waste time looking around the Solid Affiliate settings for coupons. By leveraging WooCommerce’s coupon system, you get tight integration and the many features you’re used to seeing with WooCommerce coupons, such as Usage Limits, Expiration Dates, and more. Smart!
REFER-A-FRIEND: Using Solid Affiliate’s coupon feature can be a creative way to build a refer-a-friend system. For example, the affiliate could get a 10% commission by referring a “friend” who gets a coupon for 10% off.
- Work With Your Existing Users > Skip
Note: This setting will only appear on websites with existing users. New builds will not see this option.
Important: Depending on what platform or service you use to send emails, the built-in option of sending out affiliate invites to your existing users/customers is risky because of the potential email reputation fallout (bounce rates, emails marked as SPAM, etc.). I use and highly recommend MailPoet to cover all website email-related communications, and it’s what I’ll use to announce the arrival of my newly launched affiliate program since I’ve already got the consent of recipients.
- Enter your license key if you’ve already purchased Solid Affiliate, or click ‘Skip For Now’ to continue with a fully functional 7-Day Trial (FREE).
Settings
General
WordPress Dashboard > Solid Affiliate > Settings > General
URL Tracking
- Referral Variable > Changed ‘sld’ to ‘friend.’
Important: While you might use Solid Affiliate and never switch to another affiliate solution, setting a universal variable is still good. That way, if you ever change, your links stand a good chance of carrying over and not breaking.
Other Referral
- New Customer Commissions > Enable
- Enable Zero Value Referrals > Disable
- Prevent Self Referral > Enable
- Minimum Payout > $0
Note: Since I’m rewarding affiliates with store credit, I want to set the minimum payout threshold to a lower value so they can use those funds sooner rather than later. If I weren’t using store credit, I’d set the minimum payout threshold to a higher value, like $150.
Important: While I didn’t change the default setting (30 days) for the ‘Referral Grace Period,’ you should pay close attention to this and make sure it aligns with your business. You want to avoid paying affiliates while losing the sale(s) they generated. For example, let’s say you pay the affiliate after the 30-day grace period, and then on day 31, the customer asks for a refund. This equates to you paying the affiliate for nothing.
Lifetime Commissions
- Enable Lifetime Commissions > Enable
Affiliate Portal & Registration
WordPress Dashboard > Solid Affiliate > Settings > Affiliate Portal & Registration
Affiliate Registration
- Require Affiliate Registration Approval > Disable
Affiliate Portal
- Affiliate Portal Forms (Logged Out) > Only the Affiliate Registration Form.
- Logout Link > Disable
- Hidden Affiliate Portal Tabs > Payouts Tab > I’m toggling this ON to hide this since I’m using store credit instead of cash payouts.
- Hidden Affiliate Portal Tabs > Settings Tab > Toggle ON to hide this since affiliates cannot use this tab.
Custom Registration Form
- Terms of Use Page > Select your corresponding page.
- Terms of Use Label > Since I’m a one-person company, I adjusted the wording to reflect that.
Note: For performance and privacy, I recommend avoiding reCAPTCHA and opting for a different solution, such as Cloudflare Turnstile (Free) or an anti-SPAM solution from Club partners.
Rearrange Portal Tabs
The code snippet below allows you to rearrange the portal tabs in any order you like. Simply reorder the highlighted lines as desired.
add_filter( 'solid_affiliate/default_affiliate_tabs', 'custom_affiliate_portal_tabs_order', 999 );
function custom_affiliate_portal_tabs_order($affiliate_word = 'Affiliate') {
    $default_tabs = [
        ['dashboard', __('Dashboard', 'solid-affiliate')],
        ['referrals', __('Referrals', 'solid-affiliate')],
        ['visits', __('Visits', 'solid-affiliate')],
        ['payouts', __('Payouts', 'solid-affiliate')],
        ['coupons', __('Coupons', 'solid-affiliate')],
        ['creatives', __('Creatives', 'solid-affiliate')],
        ['urls', $affiliate_word . ' ' . __('Links', 'solid-affiliate')],
        ['settings', __('Settings', 'solid-affiliate')],
    ];
    return $default_tabs;
}
Custom Registration Form
WordPress Dashboard > Solid Affiliate > Settings > Customize Registration Form
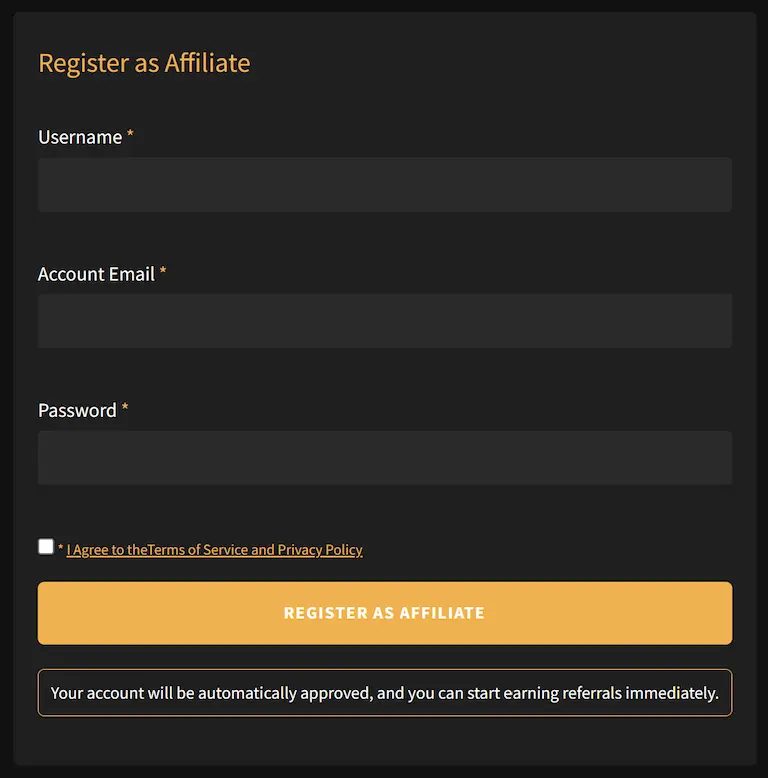
Solid Affiliate gives you flexibility with the registration form, including the ability to add and rearrange fields easily. You can see how your affiliate registration form looks out of the box by visiting the affiliate page that corresponds to your website (e.g., yourwebsite.com/affiliates).
The form looks pretty good by default, but I need to match the dark mode look of my websites, so I used WPCodeBox to apply the CSS below only where it needed to be applied (for performance)…the affiliate portal.
/****** GLOBAL ******/
/**** TEXT ****/
p {
    color: #fff !important;
}
/**** TABLE ROWS ****/
/** EVEN ROWS **/
table.sld-ap-table tr:nth-child(even) {
    background: #333 !important;
}
/**** PAGINATION ****/
/** TEXT **/
.sld-pagination {
    color: #777 !important;
}
/** NEXT - PREVIOUS **/
.sld-pagination a {
    border: none;
}
/* ICONS */
path {
    fill: #467FF7 !important;

}
/**** TOOLTIPS ****/
.sld-tooltip {
    display: none;
}
/**** MARKED/HIGHLIGHTED TEXT ****/
mark {
    color: #467FF7;
    background: transparent;
}
/**** INPUT ****/
input {
    border: none !important;
    background: #2B2B2B !important;
    color: #fff;
}
input:focus {
    border: none !important;
    background: #333 !important;
}
input[type="text"]:focus-visible {
    outline: none !important;
}
/** BUTTONS **/
input[type="submit"] {
    background: #467FF7 !important;
}
input[type="submit"]:hover {
    opacity: .95 !important;
}
/**** NOTICES ****/
/** MESSAGE **/
.sld-ap-form_notice {
    border: 1px solid #467FF7 !important;
    color: #fff !important;
    background: #1f1f1f !important;
}
/* MESSAGE ICON */
.sld-ap-form_notice_icon {
    display: none;
}


/******** AFFILIATE PORTAL ********/
/****** BOX ******/
.sld-ap-grid_container {
    background: #1f1f1f !important;
    border: none !important;
}
/**** LOGGED IN AS ****/
.sld-ap-header .sld-ap-login-user span {
    color: #fff !important;
}
.sld-ap-header .sld-ap-login-user .sld-ap-login-user_name {
    color: #467FF7 !important;
}
/**** INFO ROW ****/
.sld-ap-info {
    background: #282828 !important;
    border: none !important;
}
/** HIDE THE PAYMENT EMAIL HEADING SINCE PAYMENT IS MADE IN STORE CREDIT **/
.sld-ap-mr20:nth-child(2) {
    display: none !important;
}
/** INFO ROW HEADINGS **/
span.sld-ap-info-box-top {
    color: #fff !important;
}
/** INFO ROW VALUES **/
.sld-ap-info-box-bottom, .sld-ap-info-box-bottom a {
    color: #467FF7 !important;
}
/* APPROVAL STATUS */
.sld-ap-affiliate-status-approved {
    color: #467FF7 !important;
}
/** SIDE MENU **/
/* ACTIVE MENU ITEM */
ul.sld-ap-nav_menu>li a.active {
    color: #467FF7 !important;
    border: none;
}
/* INACTIVE MENU ITEM */
ul.sld-ap-nav_menu>li a {
    color: #777 !important;
}
ul.sld-ap-nav_menu>li a svg.sld-ap-nav_menu-icon {
    fill: #333 !important;
}
ul.sld-ap-nav_menu>li a:hover {
    background: #252525;
}
/* HOVERED MENU ITEM */
ul.sld-ap-nav_menu>li a:hover {
    background: #252525 !important;
    color: #467FF7 !important;
}
ul.sld-ap-nav_menu>li a:hover svg.sld-ap-nav_menu-icon {
    fill: #467FF7 !important;
}
/**** DASHBOARD ****/
/** GENERAL TEXT **/
p.sld-ap-description {
    color: #fff !important;
}
/** STAT BOXES **/
/* BOX */
.sld-ap-dashboard_item {
    border: 1px solid #333 !important;
}
/* HEADINGS */
.sld-ap-dashboard_item-subtitle {
    color: #fff !important;
}
/* VALUES */
.sld-ap-dashboard_item-value {
    color: #467FF7 !important;
}


/**** FORMS ****/
/** BOX **/
.sld-ap-form_box {
    background: #1f1f1f !important;
    border: none !important;
}
/** ERROR MESSAGES */
.sld-ap-form_error {
    color: #fff !important;
}
/** HEADINGS **/
.sld-ap h2 {
    color: #467FF7;
}
/** FIELD LABELS **/
/* REQUIRED ASTERISKS */
.sld_field-title.required>span.sld_title-text:after {
    color: #467FF7 !important;
}
/* SUBLABELS (i.e., labels under the fields) */
.sld_field-description {
    color: transparent !important;
    opacity: 1 !important;
}
/** TERMS AGREEMENT **/
/* REQUIRED ASTERISK */
#is_accept_affiliate_policy+p::before {
    color: #467FF7 !important;
}
/* LINK COLOR */
.sld-ap-form_checkbox a {
    color: #467FF7 !important;
}
/**** REFERRALS, VISITS, PAYOUTS, AND COUPONS ****/
/** TABLE HEADINGS **/
table.sld-ap-table th {
    border: 1px solid #333;
}
/** TABLE DATA **/
/* DATA */
table.sld-ap-table td {
    color: #467FF7;
}
/* BORDERS */
table.sld-ap-table td {
    border: 1px solid #333;
}
/**** CREATIVES ****/
/** BOXES **/
.sld-ap-creative_wrapper-card_box {
    border: none;
}
/** VALUES **/
.sld-ap-creative_wrapper-card_box-text p {
    color: #467FF7 !important;
}
/** DOWNLOAD BUTTON **/
.sld-ap-creative_wrapper-card_box-copy a[download] {
    color: #467FF7;
    border: 1px solid #467FF7;
}
.sld-ap-creative_wrapper-card_box-copy a[download]:hover {
    color: #467FF7;
    opacity: .95;
}
/** EMBED CODE BUTTON **/
.sld-ap-creative_wrapper-card_box-copy a {
    background: #467FF7;
}
.sld-ap-creative_wrapper-card_box-copy a:hover {
    color: #fff;
    opacity: .95;
}
/**** AFFILIATE LINKS ****/
/** NUM OF LINKS/SLUGS USED **/
.slugs-counter span {
    color: #467FF7 !important;
}
The image below gives you an idea of how things will look, but definitely check out the video at the bottom of this guide to see how everything turned out for the forms, affiliate portal, etc.
Affiliate Endpoint
Why It’s Needed
If you refer to the ‘Affiliate Portal’ setting earlier in this guide, you’ll notice I set the portal only to show the registration form and not the login form. This decision will become clearer as you read on.
Using the default setup of displaying the Registration and Login form for all to see/access presents a problem if you’re not a fan of having people log into the backend of WordPress.
Suppose someone goes to register as an affiliate and already has an account on your website. You would want them to be aware of this so they can log in before registering as an affiliate.
The good news is that Solid Affiliate will inform them as soon as they input their username or email address. The bad news is they’ll be given a link to log into the typical WordPress backend login screen.
Instead, we want them to log into the front end of the website, as they are used to doing, by adding an affiliate menu item (i.e., endpoint) to their account dashboard (/my-account/affiliates).
Long story short, we want them to be already logged into their account before they see any affiliate form.
Endpoint Setup
Register Solid Affiliate Endpoint
This code snippet registers the ‘Affiliates’ endpoint with WooCommerce, so you can manage it under WordPress Dashboard > Appearance > Menus > WooCommerce.
add_filter( 'woocommerce_account_menu_items', function ( $items, $endpoints ) {
    $items['affiliates'] = 'Affiliate';
    return $items;
}, 10, 2 );
Note: By default, MyListing includes a set of WooCommerce endpoints. So, to get the affiliate endpoint to show up, you need to create a new WooCommerce menu and add the desired endpoints.
Integrations
WordPress Dashboard > Solid Affiliate > Settings > Integrations
WooCommerce is enabled by default and will stay that way since Solid Affiliate requires it. I don’t have a need for the other integrations since I switched from Mailchimp to MailPoet, and I’ll be using the Store Credit feature to reward affiliates, eliminating the need for PayPal integration.
Emails
WordPress Dashboard > Solid Affiliate > Settings > Emails
Email Notifications
I toggled OFF the following because I’m automatically approving affiliates, and I don’t need to be notified.
- Affiliate Manager gets an email when: New Affiliate has registered
- Affiliate Manager gets an email when: New Referral has been created
Email Templates
WordPress Dashboard > Solid Affiliate > Settings > Emails
Solid Affiliate gives you a simple interface to edit the design of your email templates. They also provide some pre-made code snippets for changing your templates’ entire look (e.g., simplified, dark mode).
What I did:
- Replaced the Solid Affiliate header logos with my own.
- Removed the Solid Affiliate footer logos.
- Adjusted the colors, buttons, etc., to match my branding.
Note: After you adjust the design of your email templates, use the ‘Send test email to affiliate manager(s)’ button to send yourself an email so you can see how things look on your email client (Outlook, Gmail, etc.). Things will look different depending on the email client, and there’s not much you can do about it, so don’t beat yourself up by spending hours trying to find out why.
Misc
WordPress Dashboard > Solid Affiliate > Settings > Misc
I didn’t touch any settings in this area, but I recommend you look at what’s available and make the best choice for your business.
Subscription Renewal Referrals
WordPress Dashboard > Solid Affiliate > Settings > Subscription Renewal Referrals
If you use WooCommerce Subscriptions on your website, you can reward affiliates for every ongoing subscription payment the customer they referred makes.
I like to set the subscription renewal rate to a lower rate (5%) than the default commission rate (20%) since the affiliate will be rewarded repeatedly.
Addons
WordPress Dashboard > Solid Affiliate > Addons
For my particular businesses, I turn OFF all addons except the following:
- Auto Create a Coupon for all New and Approved Affiliates
- Store Credit
I recommend you look at what’s available and make the best choices for your business.
Store Credit
WordPress Dashboard > Solid Affiliate > Addons > Store Credit
Settings
The only thing I did here was configure the email template to match the branding of my other Solid Affiliate email templates.
Affiliate Program Page
This is essentially a landing page for your affiliate program. It will include details about your program, a link to your registration page, a link to your login page, etc.
- Create a page named ‘Affiliate Program’ or similar.
- Design the page as desired.
- Include a call-to-action (button, link, etc.) to your My Account endpoint (/my-account/) in your design, so affiliates can log in and then access the affiliate endpoint.
Club Template: MyListing Club – Affiliate Program Page
Creatives
This is an area within the affiliate portal where you can drop media (logos, banners, etc.) so your affiliates can best represent your brand. In the steps below, I’ll walk you through adding a logo that you’ve already added to your WordPress media library.
- WordPress Dashboard > Media > Upload the logo to your website if it’s not already there.
- Solid Affiliate > Creatives
- Click ‘Add New.’
- Name > Give the logo a name like ‘Logo – Square’ or similar.
- URL > Enter the place on your website (e.g., https://mylisting.club) where you want to send prospective customers when they click on the square logo.
- Creative Image URL > Paste in the URL of the square logo from step #1.
- Save changes.
Testing Solid Affiliate
Solid Affiliate works straight out of the box with no additional configuration, but it is still best to test the system for yourself to ensure everything is working as expected for your particular environment.
Note: At this point, I recommend creating a fresh copy of your LIVE website and cloning it into your Staging environment. Testing all of this stuff in Staging is much easier and won’t pollute your stats, orders, etc.
Testing – Affiliate Sign Up
- Open your WordPress Dashboard in one browser (e.g., Chrome).
- Go to your affiliate registration page on a completely separate incognito browser (e.g., Safari).
- Sign up as an affiliate on your site using the Affiliate Registration form.
- The new test affiliate account should appear in your admin dashboard under Solid Affiliate > Affiliates.
- Unless you’ve turned OFF this notification as I have, you’ll want to verify that you’ve received a new affiliate notification email.
- Unless you automatically approve affiliates, as I am, the test affiliate will have a ‘Pending status,’ and you’ll set the account to ‘Approved.’
- Unless you’ve turned OFF this notification as I have, verify that you’ve received the affiliate application approval email under the email address used for the affiliate.
Testing – Visits
- Open your WordPress Dashboard in one browser (e.g., Chrome) and on a completely separate incognito browser (e.g., Safari).
- Add your website’s URL in the browser address bar and append a referral variable to the end that matches one of your active affiliates (e.g., https://domain.com/?friend=1).
- Back in your WordPress Dashboard, under Solid Affiliate > Visits, refresh the visits page, and you should see a visit recorded.
Testing – Referrals
- Continuing on in that same browser we used when testing the visits, complete a new purchase of a free product or apply a coupon to make the purchase free.
- You should see a new referral from your WordPress Dashboard under Solid Affiliate > Referrals.
- Follow the order link to view helpful information Solid Affiliate provides about the referral.
- Verify if the referral is reflected in the affiliate portal.
Testing – Affiliate Tracked Coupon
- WordPress Dashboard > Marketing > Coupons > Create a coupon.
- Under the Solid Affiliate tab, enter the ID of the Affiliate to be awarded a Referral.
- Complete a purchase on a separate incognito browser.
Note: Clear Solid Affiliate cookies from your browser by clicking the lock icon in the browser address bar.
- Verify that the referral was created properly under Solid Affiliate > Referrals.
- Go to the order page associated with the completed purchase; the referral associated with the coupon will appear in the Order notes.
- Verify active affiliate coupons under Solid Affiliate > Commission Rates > Active Coupons.
Testing – Affiliate Commissions
Every referral created within Solid Affiliate should be associated with the proper Affiliate, WooCommerce Order, and Visit or Coupon ID. After running a test purchase, be sure to check that the calculated commission is what you’d expect.
Troubleshooting
Stat Charts Not Showing
If the stat charts (Visits – Daily and Referrals – Daily) aren’t showing in the ‘Dashboard’ tab and you are using the Perfmatters ‘Defer JavaScript’ feature, follow the simple steps below.
- WordPress Dashboard > Pages > Affiliate Portal > Edit the page.
- Locate the ‘Perfmatters’ section in the side panel of the editor and uncheck the ‘Defef JavaScript’ option.
- Save changes.
Video Tutorial
